Showing posts with label healthy recipe. Show all posts

Thursday, February 11, 2016

Cheeseburger Cups

Forgive me, bloggers, for I have sinned. I have been absolutely terrible at blogging lately. I know I say it all the time, but life really has been so incredibly busy lately! I'm finally posting today, but guess what? I only have one picture to go with this recipe! I KNOW, I fail at life. I'm sorry!

I do hope you'll forgive me, though, because these Cheeseburger Cups are SO good.


You may see the serving size and think "Two? Two cups? That's all? That's a lot of points for two cups ..." Well let me assure you, I too thought this. I made these and I had extra Weight Watchers points, and I loaded my plate up with three of these bad boys. After the second one, I was completely full (that didn't stop me from eating the third one though - oops).

So yes, two of these cups will be a tasty and satisfying meal. Promise :)


Ingredients


  • 1 package Pillsbury Reduced Fat Crescent Rolls (8 rolls)
  • 1 lb lean ground beef
  • Salt, pepper, and garlic powder (to taste)
  • 1/2 cup onion, diced
  • 1/2 cup ketchup
  • 1 tsp brown sugar
  • 1 slice part skim American cheese
  • 1 slice part skim provolone cheese


Serving size: 2 cups
Servings per recipe: 4
Weight Watchers Smart Points value: 14


Instructions


  1. Preheat the oven to 375 degrees F.
  2. Lightly spray a muffin pan with no-calorie cooking spray. Separate the biscuits and line 8 of the muffin holes with a biscuit, forming a cup shape as best as you can.
  3. Spray a large skillet with no-calorie cooking spray. Over medium/high heat, cook the beef, using a spoon or spatula to break it apart until all the meat is browned and cooked. Season the meat with salt, pepper, and garlic powder.
  4. Once the meat is cooked, add the onion to the skillet. Cook for about 3-4 minutes, stirring occasionally. Add the ketchup and brown sugar and cook until combined. Remove the skillet from the heat.
  5. Spoon the meat into the crescent roll cups, distributing evenly among the 8 cups. Pop the cups into the oven and cook for 10-11 minutes.
  6. In the meantime, cut each slice of cheese (I used one American and one provolone, but feel free to switch this up) into 4 squares, so you have 8 small squares of cheese. After the cups cook for 10 or 11 minutes, remove the tray from the oven and add a cheese square to the top of each cup. Return to the oven and cook an additional 2-3 minutes, or until cheese looks gooey.
  7. Transfer the cups to a plate. Drizzle some additional ketchup on top and enjoy!


Wednesday, January 20, 2016

Philly Cheesesteak Lettuce Wraps

Hello again!

I may have mentioned this before, but I only recently started eating steak. I KNOW. Weird. Growing up, I never liked it. I can't even remember what made me try it again after years of not liking it, but the important thing is that I did. And it was like a light bulb went off over my head. Like, "what took you so long?" Or, "where have you been all my life?"

Because now I'm all about <3 steak <3.


Over the summer, I tried my first Philly Cheesesteak. My dad made it. Steak and peppers and onions grilled to perfection on a roll and topped with melted cheese. It was a life-changing moment, I guess, because since then I've been a steak lover.

For this recipe, I had to cook a steak for the first time. I decided to use my George Foreman Grill to cook it, and it came out pretty good.


After the steak was cooked, I cut it up and put it back on the Foreman to melt the cheese. If you don't have a Foreman, you can grill the steak, cook it in the over, or sear it - whatever you choose. You can also use a broiler to melt the cheese when you're done.


Here's a tip for melting the cheese using a Foreman: once the steak and cheese are back on the grill, DON'T close the grill all the way. I just held the lid about an inch above the cheese for 30-45 seconds and it melted the cheese really fast.

This recipe is super easy. The most time consuming thing is cutting the peppers and onions and waiting for them to cook. But over medium/high heat, it really doesn't take that long.


To make these healthier, I swapped the carby rolls for iceberg lettuce wraps. 


As an optional extra, you can add some chipotle mayo to the lettuce wraps. Definitely not necessary, but it does give it that extra kick! One of my favorite blogs, Pinch of Yum, recommends Sir Kensington's so that's what I use. One tablespoon can be distributed among three wraps - you definitely don't need a lot.

And that's that! Enjoy!


Ingredients


  • 1/2 tbsp salted butter
  • 1 medium vidalia onion, sliced thin
  • 5.5 oz lean beef sirloin, seasoned with salt, pepper, garlic powder, and steak seasoning
  • 1 green bell pepper, sliced thin
  • 2 slices part-skim provolone cheese
  • 6 iceberg lettuce leaves


Serving size: 3 wraps
Servings per recipe: 2
Weight Watchers Smart Points value: 7


Instructions


  1. Place the butter in a large skillet over medium heat. Once melted, add the onions and cook until golden brown (caramelized), stirring occasionally.
  2. While the onions are cooking, cook the steak. I cooked mine on the Foreman Grill (preheated to 400 and seasoned with steak seasoning, salt, pepper, and garlic powder). It took about 7-8 minutes to cook through.
  3. When the onions are done, remove them from the skillet. Place the skillet back on the stove and give it a spray with no-calorie cooking spray. Add the peppers and cook until soft, stirring occasionally. You may need to re-spray the skillet and stir the peppers if they dry up while cooking.
  4. When the peppers are done, lower the heat to low. Add the onions back into the pan and stir occasionally. (NOTE: this is just to keep the peppers and onions warm while you prepare the rest of the meal. You could also remove them from the heat - they shouldn't cool off too much).
  5. When the steak is done cooking, remove from the heat (but do NOT turn off the grill). Slice the steak thin, and then return it to the grill. Add the provolone on top and let sit until the cheese melts (it helps if you partially close the Foreman - almost as if you're broiling. Don't close it all the way - you'll have to hold it, but this will melt the cheese in about 30 seconds).
  6. Distribute the peppers and onions among the iceberg leaves. Top with the steak and cheese. Roll up and enjoy!


Saturday, July 4, 2015

Lightened-Up Texas Toast

Happy Independence Day, everyone! Sorry for the long hiatus between my last post and this one - work has been busy, and I've taken on some freelance work as well, so things have been a bit crazy. I hope everyone has something fun planned for the holiday today! Me? I'll be relaxing at my in-laws' house, spending time with good people and eating good BBQ'd food (today will probably NOT be a diet-friendly day, but what can you do).

Anyway, I wanted to share this SUPER SIMPLE recipe for Texas toast with you! I was trying to think of a clever line about Texas being American and that's why I decided to wait until July 4th to share this recipe, but the truth is, this recipe has nothing to do with Independence Day. It's just really easy and delicious and you should make it ASAP.


My husband found Texas toast in the supermarket a few years ago. It's basically thick garlic bread, toasted, and covered in melted cheese. It's amazing, but definitely not amazing for someone who is trying to count calories. So a few weeks ago, I was having grilled chicken for dinner, and I wanted something on the side. My husband, who for some reason (like most men I know) doesn't have to worry about his weight, was making the store-brand Texas toast with his dinner, and it looked REALLY good. So I opened my fridge and saw that I had some English muffins, and I decided to see what I could do.

I toasted an English muffin, then covered each part with I Can't Believe It's Not Butter spray. Zero-calorie butter spray can be your best friend in recipes. Personally, I don't think it's tasty enough on its own to have with nothing else (I'd never eat toast with butter spray and nothing else) but it's good when paired with something else. For example, toast with butter spray and jelly, toast with butter spray and cinnamon sugar, etc. And in this recipe, it works perfectly.


Next, I sprinkled (pretty generously) garlic powder on top of the spray. Then I took some part-skim mozzarella and spread it across the top of the garlic. Pop it in the oven at 375 for about 5 minutes until the cheese melts, and there you have it - easy, delicious, lightened-up Texas toast.


I made my husband try it - he approves! He'll probably continue to eat the "good stuff" from the supermarket because he can, but I'm happy he approves of my lighter version too.

That's it! Make this the next time you have chicken or pasta and let me know what you think!

Until next time!


Ingredients


  • 2 Fiber One English muffins
  • I Can't Believe It's Not Butter Spray (roughly 32 sprays)
  • Garlic powder (to taste)
  • 2 oz part-skim mozzarella cheese


Serving size: 2 pieces (half of recipe)
Weight Watchers PointsPlus value: 5


Instructions


  1. Preheat the oven to 375 degrees.
  2. Toast each English muffin to desired crispiness.
  3. Spray each muffin half with butter spray. The recipe calls for ~32 sprays, or 8 per piece of toast, because I like mine extra buttery. Feel free to use more or less as desired. Sprinkle garlic powder over the top of each piece.
  4. Distribute the cheese evenly among the pieces of toast. I've been using the mozzarella blocks lately, so I measure out 2 oz on my food scale and then slice it into small pieces and distribute them among the pieces. If you use shredded cheese, this will probably be easier to measure. Either way, each piece of toast gets about half an ounce of cheese.
  5. Put the toast on a baking sheet and pop it in the oven for 5 minutes, or until the cheese looks melted but not burnt. (TIP: I like to put a piece of tin foil on my baking sheet to eliminate mess).
  6. Let cool slightly, and enjoy!


Nutritional Information


Saturday, June 20, 2015

Skinny Chicken BLT Quesadilla

I used to be a weird person who didn't like bacon. I'm still kind of picky about it - I don't like when it's too crispy and I'd rather eat it as a part of a sandwich or inside a recipe than on its own, but I've finally come to love bacon and the flavor it brings to so many dishes.

And I absolutely love a good BLT.


For those of you who don't know, BLT stands for bacon, lettuce, tomato (just covering my grounds here)! It's usually served on a roll or wrap with a ton of mayo and it's delicious. Not the healthiest option, though.

Until now.

By using low-fat mayo, center-cut bacon, and a toasted low-cal wrap, you can eliminate a lot of the fat and calories associated with a traditional BLT. And it tastes just as good, promise! I even added some grilled chicken for extra protein and to bulk this up so it can be eaten for dinner as a meal.

Start by spreading the mayo across the wrap. Layer the lettuce, tomato, and onion across one half of the wrap. 


Next, add the bacon. I cook mine in the microwave. It's easy, fast, and eliminates splatter (nothing worse than being burnt by bacon grease while cooking on the stove). Just put a paper towel on a microwave-safe dish, place your bacon on the paper towel, and place another paper towel on top. Microwave for 60-90 seconds (depending on how crispy you like it) and then crumble it over the wrap.


Next, add the chicken. I seasoned mine with salt,.pepper, and garlic and cooked it on the Foreman grill (8-10 minutes on 375 degrees) but you could also cook it on the stove or grill it - whichever you prefer. Slice the chicken and spread it across the wrap. Sprinkle with salt and pepper.


Now, the hard part - transferring the wrap to the grill. I really recommend using a Foreman is you have one - this way both sides will be grilled at the same time. You can grill the wrap on the stove, but you'll have to keep flipping it and it might be hard to keep everything inside of it. Once it's safely on the grill, fold the half not covered in filling over the other half and let it grill!


I kept my grill on 375 and let it go for about 8 minutes. 


This definitely needs to be eaten with a knife and fork. Anything else would be way too messy! I had mine with a little fat free ranch dressing on the side for dipping, but it doesn't need it.

That's it! Hope you enjoy, and as always, feedback is appreciated!

Until next time!


Ingredients


  • 1 low-calorie wrap (I used a Fiber One 80-calorie white wrap)
  • 2 tbsp low-fat mayonnaise 
  • 1/2 cup lettuce (I used romaine)
  • 6 cherry tomatoes, sliced thin
  • 1/4 sweet onion, sliced thin
  • 3 slices center cut bacon (I used Oscar Mayer)
  • 1 5-oz boneless, skinless chicken breast, cooked 
  • Salt and pepper, to taste


Serving size: entire recipe
Weight Watchers PointsPlus value: 8


Instructions


  1. If you'll be using a foreman to cook this, preheat it to 375.
  2. Lay the wrap on a plate and spread the mayo across it. Arrange the lettuce, tomato, and onion across half of the wrap. 
  3. Cook the bacon in the microwave according to package instructions. Crumble on top of the veggies.
  4. Take the cooked chicken and slice it (I grilled my chicken on the Foreman, but you can cook it on the stove or the grill). Arrange the chicken on top of the bacon. Sprinkle the whole thing with salt and pepper.
  5. Transfer the wrap to the grill (I recommend using a Foreman so you don't need to flip it). Cook for 8-10 minutes. If you're using a pan on the stove, spray the pan with no-calorie cooking spray and flip continuously until the wrap is equally browned on each side.
  6. Transfer to a plate. Let cool for a few minutes, then enjoy!


Nutritional Information


Saturday, May 30, 2015

Avocado Ranch Coleslaw

Well HELLO! I apologize for getting a little off-track with my posts the last couple of weeks. Work was really busy and then I was thrown off by the holiday weekend. I hope everyone who had a three-day weekend enjoyed it! My parents have a house in upstate New York and every Memorial Day my dad's side of the family heads up there. There are tents and bonfires and games and music and singing and hanging out by the pool ... oh, and there's a TON of eating. And drinking. Let's just say Memorial Day weekend is NOT a Weight Watchers weekend. Oh well ... worth it.

But, the holiday is over and I need some healthy food back in my life. Enter this week's recipe: Avocado Ranch Coleslaw! 


I absolutely love coleslaw. But prepared the traditional way, with a ton of mayo, it's definitely not healthy. Another thing I absolutely love is avocado. Especially in summer. Something about fresh avocado (and homemade guacamole) just resembles summer to me. I came up with the idea to combine the two, and it worked out pretty nicely. The addition of ranch is just because I think ranch dressing makes everything better. Wings, veggies - what doesn't benefit from a little ranch?

Anyway, let's discuss this recipe. It's really easy and tasty too. And I'm already thinking of ways it can be used other than just as a side dish (hint: I think it would be REALLY yummy on shrimp tacos. There may or may not be a recipe coming soon that uses this coleslaw that way ...)

Start with a package of coleslaw in a large bowl. I usually buy Dole Classic Coleslaw when I make slaw, but any brand will do.


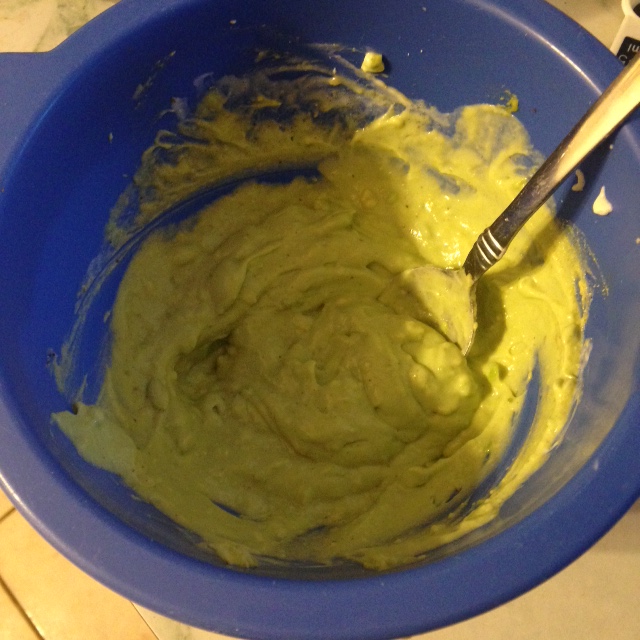
Then, in a small bowl, combine everything else (avocado, ranch, sour cream, mayo, and vinegar). The avocado I used was perfectly ripe, so I only needed to use a spoon to combine everything. If your avocado is still a little hard, you may need to use a hand mixer. I think that avocados taste the best when they're slightly mushy to touch but still firm overall. They're also much easier to mix when they're like this.


Add the avocado mix to the slaw and stir, stir, stir until the slaw is coated evenly. Season generously with salt, pepper, and garlic powder and stir again.


Cover and refrigerate until ready to serve. It tastes best if you're able to refrigerate for at least an hour. Since this uses avocado, it may start to brown after a day or so, so I recommend making this when you know you'll be eating it or serving it within a day.

Before serving, sprinkle with salt, pepper, and garlic powder again and give it a final stir to combine.

That's it! It's good on the side of a summer meal, but I personally think it would be even better when incorporated into a meal, like on a burger or sandwich, or inside some shrimp tacos ... (hint, hint)!

Enjoy! As always, feedback is appreciated!

Until next time!


Ingredients


  • 1 bag coleslaw mix 
  • 1 medium avocado (about 7 oz), shelled and pit discarded
  • 3 tbsp fat free ranch dressing
  • 1 tbsp fat free sour cream
  • 1 tbsp low fat mayonnaise
  • 1/2 tsp white vinegar
  • Salt, pepper, and garlic powder (to taste, but I recommend being generous with these)


Serving size: 1/4 of recipe
Weight Watchers PointsPlus value: 3


Instructions


  1. Empty the coleslaw mix into a large bowl. Set aside.
  2. In a small bowl, combine the avocado, ranch, sour cream, mayo, and vinegar. Depending on how soft your avocado is, you may need a hand mixer for this.
  3. Add the avocado mix to the slaw and stir until the slaw is evenly coated. Season generously with salt, pepper, and garlic powder, and stir to combine.
  4. Cover and refrigerate until ready to serve (I recommend refrigerating for at least an hour, and serving within a day).
  5. Before serving, season again with salt, pepper, and garlic powder and give the slaw a final stir.


Nutritional Information


Saturday, May 2, 2015

Chocolate Chip Pumpkin "Pancake" Muffins

It doesn't get much easier than this.


Throw a bunch of ingredients into a bowl, mix them up, put them in a pan, and bake. That's it.

I don't know if I could handle much more than that on a beautiful Saturday like the one we're having today.


To check if the muffins are done baking, stick a knife or a toothpick into the middle of one. If it comes out clean, they're done! (Note: If there's some melted chocolate on the knife, that's okay - as long as there's no batter).

I made these last Sunday ... I ate one immediately, then wrapped the pan in foil and put it in the fridge. I took one to work each day for breakfast. They taste especially good if you microwave them for 10-20 seconds before eating ... the chocolate gets all melty and delicious and perfect.

I plan on doing the same thing this week with the batch I just made.

That's really it. This might be the easiest recipe I've ever created.

Until next time!


Ingredients

  • 1 cup Heart Smart Bisquick pancake & baking mix
  • 1/3 cup Libby’s 100% pure pumpkin
  • 1/4 cup pancake syrup (I use Aunt Jemima Butter Light)
  • 3 oz nonfat plain Greek yogurt
  • 3 tbsp chocolate chips (I use Nestle Toll House semi sweet)
  • 1 tsp ground cinnamon
  • 2 tsp vanilla extract
  • 1 zero-calorie sweetener packet (I use Sweet & Low)


Serving size: 1 muffin
Weight Watchers PointsPlus value: 4

Instructions

  1. Preheat the oven to 425 degrees. Spray a 6-cup muffin pan with no-calorie nonstick cooking spray and set aside.
  2. In a medium bowl, combine all ingredients. Distribute mix evenly among the muffin cups.
  3. Bake for 15-17 minutes until the muffins are golden brown on top and a knife or toothpick inserted into the center comes out clean.


Nutritional information


Saturday, April 25, 2015

Chicken Stuffed with Spinach, Ricotta, and Sun-Dried Tomatoes

Hi guys. Me again. And I brought a friend, Spinach and Ricotta. Remember him? He's awesome. But this time, he brought Sun-Dried Tomatoes along and let me tell you, three is most definitely NOT a crowd with this group.


This recipe is so easy and delicious. It's perfect for a quick after-work dinner or to make over the weekend and refrigerate for lunches for the week. I've made a lot of chicken in my lifetime, but I think I can officially say this will be my new go-to recipe.

It's really easy too, you guys. You just need to cut your chicken breasts in half lengthwise, mix up your filling, and spread it on the chicken. Cutting chicken breasts lengthwise isn't the easiest thing to do, but you'll be okay if you use a sharp knife. I promise. Also, it doesn't have to be perfect. Just cut them in half lengthwise as best as you can.

 PRE-CUT CHICKEN BREASTS
CHICKEN BREASTS HALVED LENGTHWISE

Then, mix up your filling. It's important to use sun-dried tomatoes that are NOT in oil. It's much healthier this way.


Then just spread the filling across the chicken halves, top with the other halves, and bake!


The end result? Perfectly cooked chicken with a warm, cheesy, spinachy (I'm officially making "spinachy" a word - I'm an editor, pretty sure I can do that) filling.


Ta-da! I made this for the first time a few days ago and sent a picture to my friend since I knew she loved the Spinach and Ricotta English Muffin Pizzas I posted a few weeks ago. I know she'll be making this, and I'd love to know if you try it, too!

Until next time!


Ingredients

  • 4 5-oz boneless, skinless chicken breasts (I use Perdue Perfect Portions)
  • 1/2 cup part skin ricotta cheese
  • 1/2 cup frozen chopped spinach, cooked according to package instructions (TIP: I cook the whole package [9 or 10 oz, depending on the brand] and just store the leftovers in a tupperware in the refrigerator)
  • 6 sun-dried tomato halves, not in oil, chopped
  • 1/4 cup grated pecorino Romano cheese (or grated parmesan cheese)
  • Salt, pepper, and garlic powder (to taste)

Serving size: One stuffed chicken breast
Weight Watchers PointsPlus value: 5


Instructions

  1. Preheat the oven to 400 degrees. Spray a baking sheet with nonstick, no-calorie cooking spray and set aside.
  2. Using a very sharp knife, carefully halve the chicken breasts lengthwise. If the chicken isn’t very thick, this will be difficult, but doable. If you don’t get the halves exactly even, it’s fine. Close enough is fine – we’re not striving for perfection here.
  3. In a medium mixing bowl, combine the ricotta, spinach, sun-dried tomatoes, and grated cheese. Season with salt, pepper, and garlic powder and mix to combine.
  4. From the chicken breast halves, take the four larger halves and arrange them on the baking sheet. Distribute the spinach mixture evenly across all four halves, then top with the smaller halves.
  5. Bake for 15 minutes at 400 degrees. Let the chicken cool slightly (just a couple of minutes) before serving.

Nutritional Information