Showing posts with label dinner. Show all posts

Thursday, February 11, 2016

Cheeseburger Cups

Forgive me, bloggers, for I have sinned. I have been absolutely terrible at blogging lately. I know I say it all the time, but life really has been so incredibly busy lately! I'm finally posting today, but guess what? I only have one picture to go with this recipe! I KNOW, I fail at life. I'm sorry!

I do hope you'll forgive me, though, because these Cheeseburger Cups are SO good.


You may see the serving size and think "Two? Two cups? That's all? That's a lot of points for two cups ..." Well let me assure you, I too thought this. I made these and I had extra Weight Watchers points, and I loaded my plate up with three of these bad boys. After the second one, I was completely full (that didn't stop me from eating the third one though - oops).

So yes, two of these cups will be a tasty and satisfying meal. Promise :)


Ingredients


  • 1 package Pillsbury Reduced Fat Crescent Rolls (8 rolls)
  • 1 lb lean ground beef
  • Salt, pepper, and garlic powder (to taste)
  • 1/2 cup onion, diced
  • 1/2 cup ketchup
  • 1 tsp brown sugar
  • 1 slice part skim American cheese
  • 1 slice part skim provolone cheese


Serving size: 2 cups
Servings per recipe: 4
Weight Watchers Smart Points value: 14


Instructions


  1. Preheat the oven to 375 degrees F.
  2. Lightly spray a muffin pan with no-calorie cooking spray. Separate the biscuits and line 8 of the muffin holes with a biscuit, forming a cup shape as best as you can.
  3. Spray a large skillet with no-calorie cooking spray. Over medium/high heat, cook the beef, using a spoon or spatula to break it apart until all the meat is browned and cooked. Season the meat with salt, pepper, and garlic powder.
  4. Once the meat is cooked, add the onion to the skillet. Cook for about 3-4 minutes, stirring occasionally. Add the ketchup and brown sugar and cook until combined. Remove the skillet from the heat.
  5. Spoon the meat into the crescent roll cups, distributing evenly among the 8 cups. Pop the cups into the oven and cook for 10-11 minutes.
  6. In the meantime, cut each slice of cheese (I used one American and one provolone, but feel free to switch this up) into 4 squares, so you have 8 small squares of cheese. After the cups cook for 10 or 11 minutes, remove the tray from the oven and add a cheese square to the top of each cup. Return to the oven and cook an additional 2-3 minutes, or until cheese looks gooey.
  7. Transfer the cups to a plate. Drizzle some additional ketchup on top and enjoy!


Wednesday, January 20, 2016

Philly Cheesesteak Lettuce Wraps

Hello again!

I may have mentioned this before, but I only recently started eating steak. I KNOW. Weird. Growing up, I never liked it. I can't even remember what made me try it again after years of not liking it, but the important thing is that I did. And it was like a light bulb went off over my head. Like, "what took you so long?" Or, "where have you been all my life?"

Because now I'm all about <3 steak <3.


Over the summer, I tried my first Philly Cheesesteak. My dad made it. Steak and peppers and onions grilled to perfection on a roll and topped with melted cheese. It was a life-changing moment, I guess, because since then I've been a steak lover.

For this recipe, I had to cook a steak for the first time. I decided to use my George Foreman Grill to cook it, and it came out pretty good.


After the steak was cooked, I cut it up and put it back on the Foreman to melt the cheese. If you don't have a Foreman, you can grill the steak, cook it in the over, or sear it - whatever you choose. You can also use a broiler to melt the cheese when you're done.


Here's a tip for melting the cheese using a Foreman: once the steak and cheese are back on the grill, DON'T close the grill all the way. I just held the lid about an inch above the cheese for 30-45 seconds and it melted the cheese really fast.

This recipe is super easy. The most time consuming thing is cutting the peppers and onions and waiting for them to cook. But over medium/high heat, it really doesn't take that long.


To make these healthier, I swapped the carby rolls for iceberg lettuce wraps. 


As an optional extra, you can add some chipotle mayo to the lettuce wraps. Definitely not necessary, but it does give it that extra kick! One of my favorite blogs, Pinch of Yum, recommends Sir Kensington's so that's what I use. One tablespoon can be distributed among three wraps - you definitely don't need a lot.

And that's that! Enjoy!


Ingredients


  • 1/2 tbsp salted butter
  • 1 medium vidalia onion, sliced thin
  • 5.5 oz lean beef sirloin, seasoned with salt, pepper, garlic powder, and steak seasoning
  • 1 green bell pepper, sliced thin
  • 2 slices part-skim provolone cheese
  • 6 iceberg lettuce leaves


Serving size: 3 wraps
Servings per recipe: 2
Weight Watchers Smart Points value: 7


Instructions


  1. Place the butter in a large skillet over medium heat. Once melted, add the onions and cook until golden brown (caramelized), stirring occasionally.
  2. While the onions are cooking, cook the steak. I cooked mine on the Foreman Grill (preheated to 400 and seasoned with steak seasoning, salt, pepper, and garlic powder). It took about 7-8 minutes to cook through.
  3. When the onions are done, remove them from the skillet. Place the skillet back on the stove and give it a spray with no-calorie cooking spray. Add the peppers and cook until soft, stirring occasionally. You may need to re-spray the skillet and stir the peppers if they dry up while cooking.
  4. When the peppers are done, lower the heat to low. Add the onions back into the pan and stir occasionally. (NOTE: this is just to keep the peppers and onions warm while you prepare the rest of the meal. You could also remove them from the heat - they shouldn't cool off too much).
  5. When the steak is done cooking, remove from the heat (but do NOT turn off the grill). Slice the steak thin, and then return it to the grill. Add the provolone on top and let sit until the cheese melts (it helps if you partially close the Foreman - almost as if you're broiling. Don't close it all the way - you'll have to hold it, but this will melt the cheese in about 30 seconds).
  6. Distribute the peppers and onions among the iceberg leaves. Top with the steak and cheese. Roll up and enjoy!


Wednesday, December 9, 2015

Pillsbury Biscuit Calzones

Is it just me, or does the end-of-the-year craziness have anyone else wishing for more hours in the day? I feel like I just posted my last recipe, when in reality it's been over 2 weeks! So I apologize again for the delay between posts. I'm hoping to be able to post more often in 2016!

Before I dive in to today's recipe, I just wanted to send a huge thank you to everyone who reads this blog and shares my recipes. This is still really new for me, and I appreciate any and all support. Lighter Bites has officially hit 250 likes on Facebook, and we are close to 100 followers on Instagram. In the grand scheme of things, that's not many people, but the support means the world to me. So thank you!

Now, the reason we're all here: FOOD. I mentioned in my last post that I love Pillsbury crescent rolls because they're so versatile - you can fill them with chocolate and make a dessert, or you can fill them with meat, cheese, etc and make a meal. I love filling them with ham and cheese or pepperoni and cheese and making mini healthy calzones.


I use Weight Watchers American cheese slices for the ham calzones and Weight Watchers mozzarella string cheese for the pepperoni calzones. Once these babies are baked and warm and gooey, you can't even notice that the cheese is low fat/low calorie.

These really are super easy to make. When I make these as a meal, I usually make four - I have two for dinner (one ham, one pepperoni) and put two in a tupperware for lunch the following day (they still taste good after being microwaved). The Pillsbury crescent rolls contains eight rolls, so if you don't think you'll use the remaining four soon, I suggest making eight calzones and refrigerating the ones you don't eat. Even in a Ziplock bag, the Pillsbury dough doesn't last very long in the fridge once it's been open. For this recipe, I made eight.

Anyway, on to this super easy, super fast recipe. All you have to do is separate the crescent rolls and lay them on a baking sheet sprayed with no-calorie cooking spray. Arrange the ham, pepperoni, and cheeses on the crescent rolls, then sprinkle with salt, pepper, and garlic powder to taste.


Carefully roll up the crescents so that all the meat and cheese is sealed inside. They don't have to look pretty - sealing everything in is the bigger priority here. If the filling sticks out a little bit, it's okay.


Bake at 375 degrees F for 9-12 minutes, or until the tops are golden brown. Remove from the oven and let cool for a minute or two, then dig in!

INGREDIENTS

  • 8 Pillsbury crescent rolls, reduced fat
  • 4 slices reduced fat American cheese (I use Weight Watchers brand)
  • 4 low-fat mozzarella string cheese sticks (I use Weight Watchers brand)
  • 6 slices ham (I like to use honey ham)
  • 20 slices turkey pepperoni
  • Salt, pepper, and garlic powder (to taste)

Serving size: 2 calzones (1 pepperoni, 1 ham)
Weight Watchers SmartPoints value: 11

INSTRUCTIONS

  1. Preheat oven to 375 degrees F. Lightly spray a baking dish with no-calorie cooking spray.
  2. Separate the crescent rolls along the pre-cut edges and lay out on the baking sheet. Top 4 of the rolls with 1 slice of American cheese each and 4 of the rolls with 1 string cheese each (you'll need to break the cheeses apart to get them to fit on the roll).
  3. On the rolls with American cheese, top each with 1 1/2 slices of ham (you'll need to fold or tear the ham to get it to fit). On the rolls with string cheese, top each with 5 slices of turkey pepperoni. Sprinkle salt, pepper, and garlic powder across the tops of all the rolls.
  4. Carefully fold the rolls so that the cheese and meat are sealed inside. Pinch edges together to seal. In some cases you may not be able to completely seal in the filling - this is okay. As long as it's mostly sealed you'll be fine.
  5. Make for 9-12 minutes or until the tops are golden brown. Remove from the oven and serve warm.

Note: nutrition information is for one ham calzone and one pepperoni calzone.

Sunday, October 11, 2015

Buffalo Chicken Mac & Cheese

So, I really hope it doesn't bother anyone that the main ingredient in this mac & cheese is, in fact, packaged mac & cheese. I've mentioned before that my goal is for my recipes to be easy, fast, and low-calorie - and I've also mentioned that I'm not a chef - so right now, I'm not in a position to create mac & cheese from scratch. Maybe someday, but for now, packaged mac & cheese it is.

But don't worry, it is GOOD.


I love Pirate's Booty white cheddar popcorn, and when I found out they made mac & cheese I knew I had to try it. The aged white cheddar shells are my favorite, and the white cheddar works really well with the hot sauce in this recipe.


I used poached chicken for this recipe because it's easy to shred. While you're boiling the water for the mac & cheese, put some water in a shallow pan. Season the chicken with salt, pepper, and garlic powder and add it to the pan.


While you're preparing the mac & cheese (according to package instructions), flip the chicken every couple of minutes. Let it boil and cook until it's completely cooked through - you'll know it's done when you cut into the middle and it's not pink.


Once the chicken is cooked, use two forks to shred it, then set it aside. Finish preparing the mac & cheese - once the pasta is cooked, you need to drain it, return it to the pan, and then add the butter, milk, and packaged cheese sauce. Stir to combine, and then add the shredded chicken to the pot and stir.


Add the ranch dressing and hot sauce and stir to combine. If you like things really spicy, add 2 tablespoons of hot sauce. If not, only add one. I've made this twice so far, and my husband and I both prefer it with one tablespoon, not 2.


Finally, add the breadcrumbs. I like to pour half the breadcrumbs (1/8 cup) right into the pot and stir it. Then, I divide the mac & cheese into two bowls and sprinkle the remaining 1/8 cup of breadcrumbs over the top.


And that's it! You're done! Perfect weeknight meal for two (or one, and then you have leftovers for lunch).

Until next time!


Ingredients


  • 1 box Pirate's Booty Shells & Cheese Aged White Cheddar, prepared according to package instructions
  • 1/4 cup milk (for mac & cheese)
  • 1/2 tbsp butter (for mac & cheese)
  • One 4-5 oz chicken breast
  • Salt, pepper, and garlic powder, for seasoning
  • 1 tbsp fat free ranch dressing
  • 1-2 tbsp Frank's Red Hot sauce (depending on how hot you like it)
  • 1/4 cup whole wheat breadcrumbs


Serving size: 1/2 recipe
Weight Watchers PointsPlus value: 12


Instructions


  1. Prepare the mac & cheese according to package instructions. You'll need the milk and butter for this.
  2. While the water is boiling, season the chicken. Add some water (about 1") to a shallow pan and bring to a boil. Place the chicken in the water. Flip every 1-2 minutes until the chicken is cooked completely - you can check this by cutting into the center of the chicken and making sure it's not pink.
  3. Once the chicken is cooked, transfer it to a plate or cutting board. Using two forks, shred the chicken. Add the shredded chicken to the finished mac & cheese and stir to combine.
  4. Add the ranch dressing and hot sauce to the pot and stir to combine.
  5. Add half of the breadcrumbs to the pan and stir. Distribute the mac & cheese into two bowls and sprinkle the remaining breadcrumbs over the top. Enjoy!


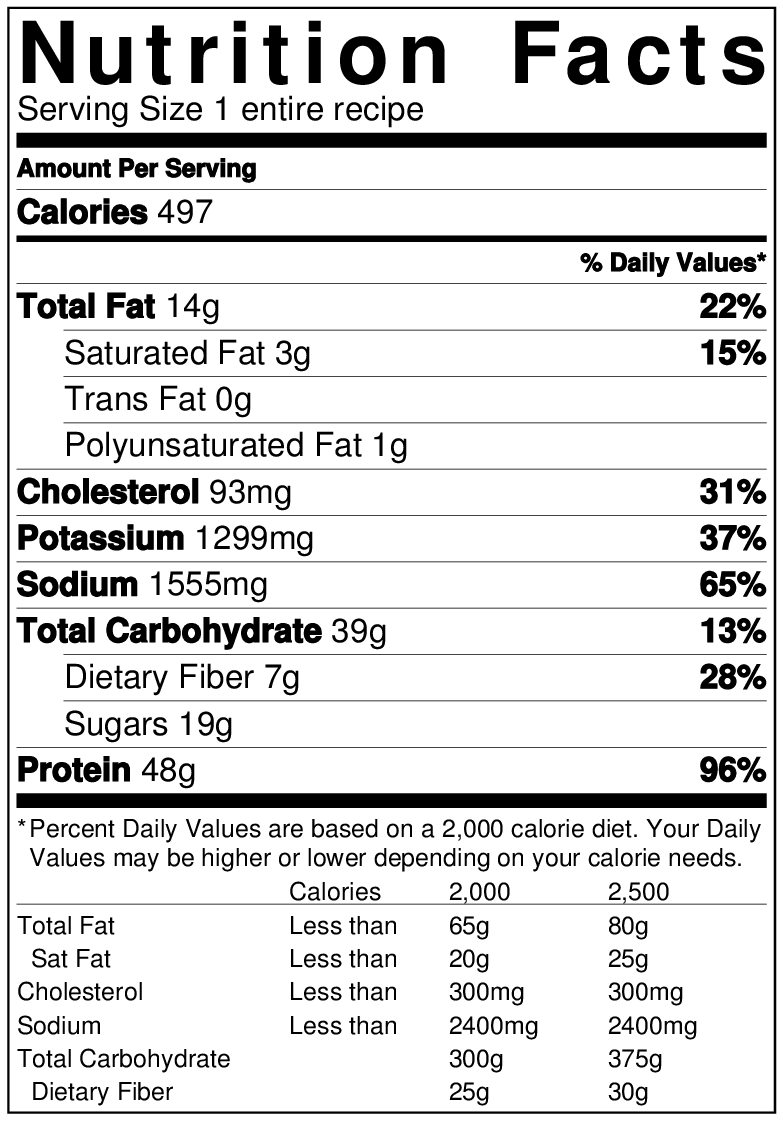
Nutrition


Saturday, June 20, 2015

Skinny Chicken BLT Quesadilla

I used to be a weird person who didn't like bacon. I'm still kind of picky about it - I don't like when it's too crispy and I'd rather eat it as a part of a sandwich or inside a recipe than on its own, but I've finally come to love bacon and the flavor it brings to so many dishes.

And I absolutely love a good BLT.


For those of you who don't know, BLT stands for bacon, lettuce, tomato (just covering my grounds here)! It's usually served on a roll or wrap with a ton of mayo and it's delicious. Not the healthiest option, though.

Until now.

By using low-fat mayo, center-cut bacon, and a toasted low-cal wrap, you can eliminate a lot of the fat and calories associated with a traditional BLT. And it tastes just as good, promise! I even added some grilled chicken for extra protein and to bulk this up so it can be eaten for dinner as a meal.

Start by spreading the mayo across the wrap. Layer the lettuce, tomato, and onion across one half of the wrap. 


Next, add the bacon. I cook mine in the microwave. It's easy, fast, and eliminates splatter (nothing worse than being burnt by bacon grease while cooking on the stove). Just put a paper towel on a microwave-safe dish, place your bacon on the paper towel, and place another paper towel on top. Microwave for 60-90 seconds (depending on how crispy you like it) and then crumble it over the wrap.


Next, add the chicken. I seasoned mine with salt,.pepper, and garlic and cooked it on the Foreman grill (8-10 minutes on 375 degrees) but you could also cook it on the stove or grill it - whichever you prefer. Slice the chicken and spread it across the wrap. Sprinkle with salt and pepper.


Now, the hard part - transferring the wrap to the grill. I really recommend using a Foreman is you have one - this way both sides will be grilled at the same time. You can grill the wrap on the stove, but you'll have to keep flipping it and it might be hard to keep everything inside of it. Once it's safely on the grill, fold the half not covered in filling over the other half and let it grill!


I kept my grill on 375 and let it go for about 8 minutes. 


This definitely needs to be eaten with a knife and fork. Anything else would be way too messy! I had mine with a little fat free ranch dressing on the side for dipping, but it doesn't need it.

That's it! Hope you enjoy, and as always, feedback is appreciated!

Until next time!


Ingredients


  • 1 low-calorie wrap (I used a Fiber One 80-calorie white wrap)
  • 2 tbsp low-fat mayonnaise 
  • 1/2 cup lettuce (I used romaine)
  • 6 cherry tomatoes, sliced thin
  • 1/4 sweet onion, sliced thin
  • 3 slices center cut bacon (I used Oscar Mayer)
  • 1 5-oz boneless, skinless chicken breast, cooked 
  • Salt and pepper, to taste


Serving size: entire recipe
Weight Watchers PointsPlus value: 8


Instructions


  1. If you'll be using a foreman to cook this, preheat it to 375.
  2. Lay the wrap on a plate and spread the mayo across it. Arrange the lettuce, tomato, and onion across half of the wrap. 
  3. Cook the bacon in the microwave according to package instructions. Crumble on top of the veggies.
  4. Take the cooked chicken and slice it (I grilled my chicken on the Foreman, but you can cook it on the stove or the grill). Arrange the chicken on top of the bacon. Sprinkle the whole thing with salt and pepper.
  5. Transfer the wrap to the grill (I recommend using a Foreman so you don't need to flip it). Cook for 8-10 minutes. If you're using a pan on the stove, spray the pan with no-calorie cooking spray and flip continuously until the wrap is equally browned on each side.
  6. Transfer to a plate. Let cool for a few minutes, then enjoy!


Nutritional Information