It is, however, in good enough shape to cook and post recipes again! I'd love for my first recipe after a hiatus to be a Lighter Bites original, but I was making this Skinnytaste-inspired recipe for a BBQ tomorrow, and it's just too good not to share.
 |
| See the new countertops?! Eeeeee! |
I've doubled everything in quantity because I'm bringing this to a BBQ tomorrow. It's so light and refreshing and perfect for summer!
I use cooked, peeled, frozen shrimp for this (and most shrimp-containing) recipes. It's easy to defrost - just let it sit in really hot water for a few minutes. The tails slide right off, and you can easily cut the shrimp into pieces.

I've also found that defrosting shrimp this way can add a lot of excess water to a recipe, so I've found a solution. I defrost and cut the shrimp first, and while I'm preparing everything else for the recipe, I let the shrimp sit in the colander in my sink to drain any excess water. It doesn't hurt to blot the shrimp with a paper towel, too.
 |
| Yep, we have a stainless steel sink now. No big deal. |


You can serve it right away (I like to serve this with pita chips - Wheat Thins makes an awesome pita chip) or refrigerate until you're ready to serve. Since there's seafood in this, I don't recommend refrigerating for longer than a day.
So that's about it! I'm so excited to be back blogging again and SO excited to share the new kitchen photos! Hope you enjoy this recipe (and don't forget to check out Skinnytaste's original and all her other stuff - she's amazing).
Until next time!
Ingredients
- 1.5 lbs cooked shrimp, peeled and chopped
- 4 celery stalks, chopped
- 3/4 medium-sized red onion, finely chopped
- 2 medium-sized cucumbers, chopped
- 4 scallions, chopped
- 3/4 cup crab meat, chopped (I used imitation)
- 1/4 cup low-fat mayonnaise
- 2 tbsp fat-free plain Greek yogurt
- Seasoned salt, to taste (I used Morton)
- Salt and pepper, to taste
- Garlic powder, to taste
Serving size: 1/8 recipe
Weight Watchers PointsPlus value: 3
Instructions
Combine all ingredients in a large bowl. Stir to combine (everything should be evenly coated with mayonnaise and yogurt). Serve immediately with pita chips, or refrigerate up to one day before serving.Note: This recipe can easily be halved and served to a smaller gathering (4 instead of 8).
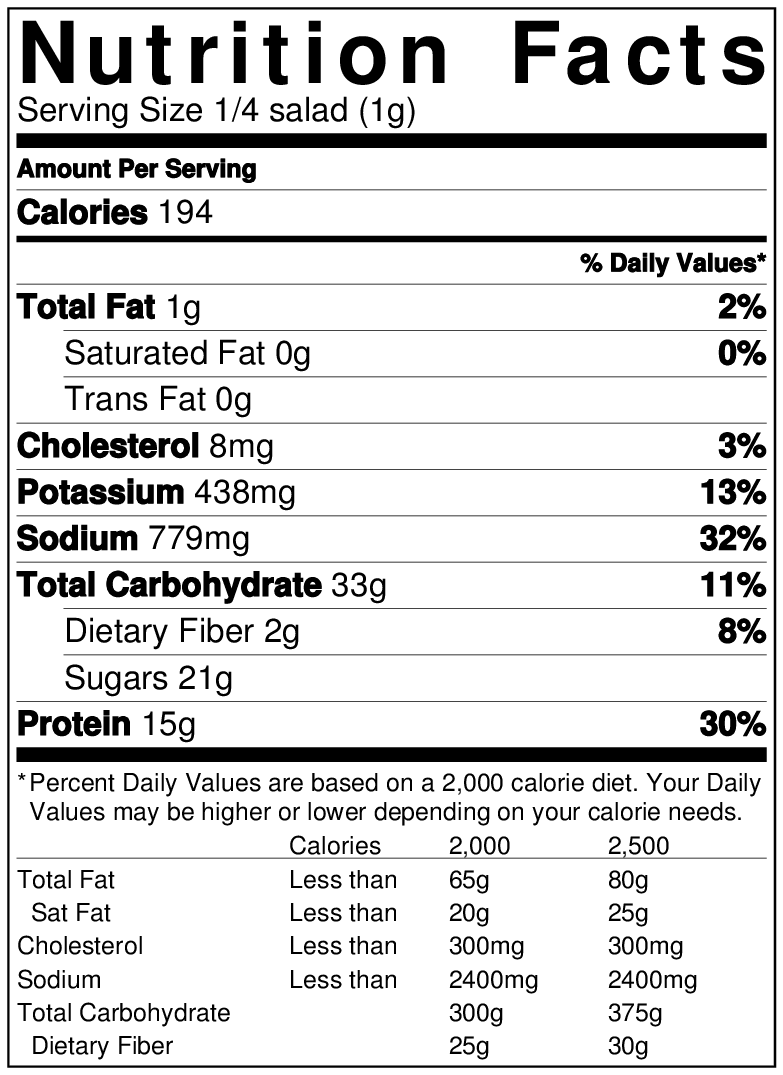
Nutritional Information