Showing posts with label low-cal. Show all posts

Tuesday, June 2, 2015

BBQ Shrimp Tacos with Avocado Ranch Coleslaw

As soon as I posted this coleslaw recipe over the weekend, I started thinking about how yummy it would be on a shrimp taco. So as promised (okay, not "promised" - I just hinted at it), here's a shrimp taco recipe. With the avocado coleslaw. A perfect combination.


This recipe also screams "summer" to me. I made it for lunch on Sunday after my husband and I spent the day outside doing yardwork and assembling our new backyard swing. It was really hot on Sunday and the cool, crispy avocado paired with the sweet BBQ shrimp made for a refreshing lunch. 

By the way, this recipe got the "husband-approved" stamp, which I'm happy about. He's a somewhat picky eater (not too bad) and sometimes I just cook for me and he cooks for him. But he ate these and he liked them, which makes me more excited to post them.

When I cook with shrimp, I like to use cooked frozen shrimp. They're simple to defrost - just let them sit in a bowl of hot water for a few minutes.


Once the shrimp are defrosted (or mostly defrosted), it's time to cook them. I used the Foreman to cook mine, but these can definitely be cooked on a grill as well. We haven't used our grill yet this season, so onto the Foreman they went.


They only need to be on the Foreman for about 3 minutes. Technically, once they're defrosted they're good to eat, but for this recipe grilled/warm shrimp works better. If you're cooking on an outdoor grill, you may want to leave them on a little longer, and then just remove them when they're grilled to your liking.

Once the shrimp are done, put them into a bowl and toss with the BBQ sauce.


While you're doing this, you can warm your tortillas. This isn't necessary, but if you're like me (in the sense that you think a warm wrap is ALWAYS better than a cold one), throw your tortillas on the grill for 30 seconds to a minute to warm them up.


Then, assemble the tacos. Layer slaw, three shrimp, and a sprinkle of ground cayenne. That's it!


Of course, this recipe does require a little advanced prep - you'll need to make the coleslaw as well. But that's super easy too and the whole thing (coleslaw and tacos) can easily be done in less than 30 minutes.

As always, I'd love to know if you have questions, comments, or feedback! Enjoy!

Until next time!

Ingredients

  • 9 medium-large frozen cooked shrimp
  • 2 tbsp BBQ sauce (I prefer Honey BBQ)
  • 3 extra thin corn tortillas
  • 1 serving Avocado Ranch Coleslaw (prepare in advance)
  • Pinch of ground cayenne pepper


Serving size: 3 tacos (entire recipe)
Weight Watchers PointsPlus value: 9

Instructions

  1. Defrost the shrimp by placing them in a bowl or hot water. Once the shrimp are soft enough, remove the tails.
  2. Place the shrimp on the Foreman or grill. Cook for approximately 3 minutes, or until grilled to your preference.
  3. Transfer the cooked shrimp to a bowl. Add the BBQ sauce and toss until the shrimp are fully coated. If you prefer, warm the tortillas on the grill while you're tossing the shrimp with sauce.
  4. Distribute the slaw evenly among the tortillas. Add three shrimp to each taco, then sprinkle with ground cayenne. 


Nutritional Information


Saturday, May 30, 2015

Avocado Ranch Coleslaw

Well HELLO! I apologize for getting a little off-track with my posts the last couple of weeks. Work was really busy and then I was thrown off by the holiday weekend. I hope everyone who had a three-day weekend enjoyed it! My parents have a house in upstate New York and every Memorial Day my dad's side of the family heads up there. There are tents and bonfires and games and music and singing and hanging out by the pool ... oh, and there's a TON of eating. And drinking. Let's just say Memorial Day weekend is NOT a Weight Watchers weekend. Oh well ... worth it.

But, the holiday is over and I need some healthy food back in my life. Enter this week's recipe: Avocado Ranch Coleslaw! 


I absolutely love coleslaw. But prepared the traditional way, with a ton of mayo, it's definitely not healthy. Another thing I absolutely love is avocado. Especially in summer. Something about fresh avocado (and homemade guacamole) just resembles summer to me. I came up with the idea to combine the two, and it worked out pretty nicely. The addition of ranch is just because I think ranch dressing makes everything better. Wings, veggies - what doesn't benefit from a little ranch?

Anyway, let's discuss this recipe. It's really easy and tasty too. And I'm already thinking of ways it can be used other than just as a side dish (hint: I think it would be REALLY yummy on shrimp tacos. There may or may not be a recipe coming soon that uses this coleslaw that way ...)

Start with a package of coleslaw in a large bowl. I usually buy Dole Classic Coleslaw when I make slaw, but any brand will do.


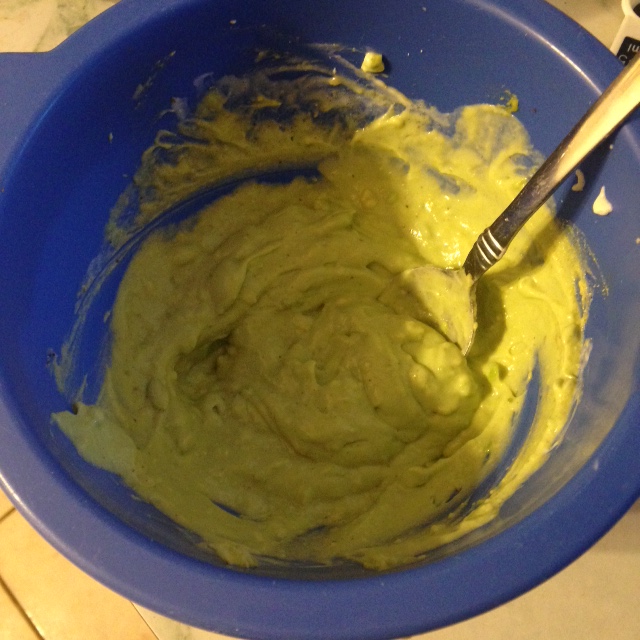
Then, in a small bowl, combine everything else (avocado, ranch, sour cream, mayo, and vinegar). The avocado I used was perfectly ripe, so I only needed to use a spoon to combine everything. If your avocado is still a little hard, you may need to use a hand mixer. I think that avocados taste the best when they're slightly mushy to touch but still firm overall. They're also much easier to mix when they're like this.


Add the avocado mix to the slaw and stir, stir, stir until the slaw is coated evenly. Season generously with salt, pepper, and garlic powder and stir again.


Cover and refrigerate until ready to serve. It tastes best if you're able to refrigerate for at least an hour. Since this uses avocado, it may start to brown after a day or so, so I recommend making this when you know you'll be eating it or serving it within a day.

Before serving, sprinkle with salt, pepper, and garlic powder again and give it a final stir to combine.

That's it! It's good on the side of a summer meal, but I personally think it would be even better when incorporated into a meal, like on a burger or sandwich, or inside some shrimp tacos ... (hint, hint)!

Enjoy! As always, feedback is appreciated!

Until next time!


Ingredients


  • 1 bag coleslaw mix 
  • 1 medium avocado (about 7 oz), shelled and pit discarded
  • 3 tbsp fat free ranch dressing
  • 1 tbsp fat free sour cream
  • 1 tbsp low fat mayonnaise
  • 1/2 tsp white vinegar
  • Salt, pepper, and garlic powder (to taste, but I recommend being generous with these)


Serving size: 1/4 of recipe
Weight Watchers PointsPlus value: 3


Instructions


  1. Empty the coleslaw mix into a large bowl. Set aside.
  2. In a small bowl, combine the avocado, ranch, sour cream, mayo, and vinegar. Depending on how soft your avocado is, you may need a hand mixer for this.
  3. Add the avocado mix to the slaw and stir until the slaw is evenly coated. Season generously with salt, pepper, and garlic powder, and stir to combine.
  4. Cover and refrigerate until ready to serve (I recommend refrigerating for at least an hour, and serving within a day).
  5. Before serving, season again with salt, pepper, and garlic powder and give the slaw a final stir.


Nutritional Information


Saturday, May 2, 2015

Chocolate Chip Pumpkin "Pancake" Muffins

It doesn't get much easier than this.


Throw a bunch of ingredients into a bowl, mix them up, put them in a pan, and bake. That's it.

I don't know if I could handle much more than that on a beautiful Saturday like the one we're having today.


To check if the muffins are done baking, stick a knife or a toothpick into the middle of one. If it comes out clean, they're done! (Note: If there's some melted chocolate on the knife, that's okay - as long as there's no batter).

I made these last Sunday ... I ate one immediately, then wrapped the pan in foil and put it in the fridge. I took one to work each day for breakfast. They taste especially good if you microwave them for 10-20 seconds before eating ... the chocolate gets all melty and delicious and perfect.

I plan on doing the same thing this week with the batch I just made.

That's really it. This might be the easiest recipe I've ever created.

Until next time!


Ingredients

  • 1 cup Heart Smart Bisquick pancake & baking mix
  • 1/3 cup Libby’s 100% pure pumpkin
  • 1/4 cup pancake syrup (I use Aunt Jemima Butter Light)
  • 3 oz nonfat plain Greek yogurt
  • 3 tbsp chocolate chips (I use Nestle Toll House semi sweet)
  • 1 tsp ground cinnamon
  • 2 tsp vanilla extract
  • 1 zero-calorie sweetener packet (I use Sweet & Low)


Serving size: 1 muffin
Weight Watchers PointsPlus value: 4

Instructions

  1. Preheat the oven to 425 degrees. Spray a 6-cup muffin pan with no-calorie nonstick cooking spray and set aside.
  2. In a medium bowl, combine all ingredients. Distribute mix evenly among the muffin cups.
  3. Bake for 15-17 minutes until the muffins are golden brown on top and a knife or toothpick inserted into the center comes out clean.


Nutritional information


Saturday, April 25, 2015

Chicken Stuffed with Spinach, Ricotta, and Sun-Dried Tomatoes

Hi guys. Me again. And I brought a friend, Spinach and Ricotta. Remember him? He's awesome. But this time, he brought Sun-Dried Tomatoes along and let me tell you, three is most definitely NOT a crowd with this group.


This recipe is so easy and delicious. It's perfect for a quick after-work dinner or to make over the weekend and refrigerate for lunches for the week. I've made a lot of chicken in my lifetime, but I think I can officially say this will be my new go-to recipe.

It's really easy too, you guys. You just need to cut your chicken breasts in half lengthwise, mix up your filling, and spread it on the chicken. Cutting chicken breasts lengthwise isn't the easiest thing to do, but you'll be okay if you use a sharp knife. I promise. Also, it doesn't have to be perfect. Just cut them in half lengthwise as best as you can.

 PRE-CUT CHICKEN BREASTS
CHICKEN BREASTS HALVED LENGTHWISE

Then, mix up your filling. It's important to use sun-dried tomatoes that are NOT in oil. It's much healthier this way.


Then just spread the filling across the chicken halves, top with the other halves, and bake!


The end result? Perfectly cooked chicken with a warm, cheesy, spinachy (I'm officially making "spinachy" a word - I'm an editor, pretty sure I can do that) filling.


Ta-da! I made this for the first time a few days ago and sent a picture to my friend since I knew she loved the Spinach and Ricotta English Muffin Pizzas I posted a few weeks ago. I know she'll be making this, and I'd love to know if you try it, too!

Until next time!


Ingredients

  • 4 5-oz boneless, skinless chicken breasts (I use Perdue Perfect Portions)
  • 1/2 cup part skin ricotta cheese
  • 1/2 cup frozen chopped spinach, cooked according to package instructions (TIP: I cook the whole package [9 or 10 oz, depending on the brand] and just store the leftovers in a tupperware in the refrigerator)
  • 6 sun-dried tomato halves, not in oil, chopped
  • 1/4 cup grated pecorino Romano cheese (or grated parmesan cheese)
  • Salt, pepper, and garlic powder (to taste)

Serving size: One stuffed chicken breast
Weight Watchers PointsPlus value: 5


Instructions

  1. Preheat the oven to 400 degrees. Spray a baking sheet with nonstick, no-calorie cooking spray and set aside.
  2. Using a very sharp knife, carefully halve the chicken breasts lengthwise. If the chicken isn’t very thick, this will be difficult, but doable. If you don’t get the halves exactly even, it’s fine. Close enough is fine – we’re not striving for perfection here.
  3. In a medium mixing bowl, combine the ricotta, spinach, sun-dried tomatoes, and grated cheese. Season with salt, pepper, and garlic powder and mix to combine.
  4. From the chicken breast halves, take the four larger halves and arrange them on the baking sheet. Distribute the spinach mixture evenly across all four halves, then top with the smaller halves.
  5. Bake for 15 minutes at 400 degrees. Let the chicken cool slightly (just a couple of minutes) before serving.

Nutritional Information